Spring Boot Admin实践

文章目录
接触到Spring Boot Admin还是因为需要一个方便查看日志的方式,Spring Boot Admin界面很友好而且还支持Eureka。Spring Boot Admin的文档真的是跟Spring系列的文档非常类似,详细又不那么详细。总体来说,这次Spring Boot Admin的使用还算比较顺利。
Spring Boot Admin功能
- 显示健康状况
- 显示详细信息,例如
- JVM和内存指标
- micrometer.io指标
- 数据源指标
- 缓存指标
- 显示构建信息编号
- 关注并下载日志文件
- 查看jvm系统和环境属性
- 查看Spring Boot配置属性
- 支持Spring Cloud的postable / env-和/ refresh-endpoint
- 轻松的日志级管理
- 与JMX-beans交互
- 查看线程转储
- 查看http跟踪
- 查看auditevents
- 查看http-endpoints
- 查看计划任务
- 查看和删除活动会话(使用spring-session)
- 查看Flyway / Liquibase数据库迁移
- 下载heapdump
- 状态变更通知(通过电子邮件,Slack,Hipchat,……)
- 状态更改的事件日志(非持久性)
Spring Boot Admin Server
通常我们都会新建一个工程来作为且仅作为Spring Boot Admin Server。
新建工程
使用Spring Initializr新建一个工程。
添加如下依赖。
 1
 2
 3
 4
 5
 6
 7
 8
 9
10
11
12
13
14
15
16
17
18
19
20
21
22
23
24
25
<dependency> <groupId>de.codecentric</groupId> <artifactId>spring-boot-admin-starter-server</artifactId> <version>2.3.1</version> </dependency> <!-- 因为要监控自身,所以需要actuator --> <dependency> <groupId>org.springframework.boot</groupId> <artifactId>spring-boot-starter-actuator</artifactId> </dependency> <dependency> <groupId>org.springframework.boot</groupId> <artifactId>spring-boot-starter-web</artifactId> </dependency> <!-- 我要使用Spring security来控制Spring Boot Admin Server的访问 --> <dependency> <groupId>org.springframework.boot</groupId> <artifactId>spring-boot-starter-security</artifactId> </dependency> <!-- Spring Boot Admin Server作为一个Eureka Client --> <!-- 个人感觉使用服务发现的话对其他Spring Boot应用来说几乎是无侵入的,只要开启actuator就行 --> <dependency> <groupId>org.springframework.cloud</groupId> <artifactId>spring-cloud-starter-netflix-eureka-client</artifactId> </dependency>application.properties
 1
 2
 3
 4
 5
 6
 7
 8
 9
10
11
12
13
14
15
16
17
18
19
eureka.instance.lease-renewal-interval-in-seconds=10 eureka.instance.health-check-url-path=/actuator/health eureka.instance.metadata-map.startup=${random.int} eureka.client.registry-fetch-interval-seconds=5 eureka.client.service-url.defaultZone=http://localhost:9999/eureka/ eureka.instance.prefer-ip-address=true # 要监控自己,所以暴露actuator的端点 management.endpoints.web.exposure.include=* management.endpoint.health.show-details=ALWAYS logging.file.name=/app/logs/spring-boot-admin.log # 登录这个工程(Spring Boot Admin Server)的用户名和密码 spring.security.user.name=root spring.security.user.password=root # Eureka的元数据,Spring Boot Admin根据每个Eureka Client的这些数据来获取用户名和密码 # 因为需要监控自己所以也需要加上这些数据 eureka.instance.metadata-map.user.name=${spring.security.user.name} eureka.instance.metadata-map.user.password=${spring.security.user.password}主类,使用
@EnableAdminServer和@EnableDiscoveryClient开启Spring Boot Admin Server和Eureka Client1 2 3 4 5 6 7 8@SpringBootApplication @EnableAdminServer @EnableDiscoveryClient public class SpringBootAdminApplication { public static void main(String[] args) { SpringApplication.run(SpringBootAdminApplication.class, args); } }
Spring Security
对于Spring Boot Admin Server我们肯定不希望没有登录验证就直接能访问,所以简单加个Spring Security控制一下。除了application.properties中关于Spring Security相关的配置,还需要一些Java Configuration。
| |
由于Spring Boot Admin Server使用表单登录,以及需要使用Http Basic 验证/actuator端点。
所以这里需要两个WebSecurityConfigurer,一个行不行?也行,但是会有瑕疵。
同时注意,/assets下的静态资源别拦截了,不然会导致一些样式加载不出来,而且登录后直接跳转到请求的静态资源。如果设置不当的话,可能导致没有登出按钮
到目前为止,我们已经可以在Spring Boot Admin Server界面上监控自己了。其实对于其他Spring Boot Admin Client(Eureka Client)也一样。因为Spring Boot Admin Server自己本身就是一个Eureka Client。下面还是讲一讲,避免混淆了。
Spring Boot Admin Client
由于使用的Eureka,所以Client需要新增的东西并不多。
application.properties
1 2 3 4 5 6 7 8 9eureka.instance.metadata-map.management.context-path=${server.servlet.context-path}/actuator management.endpoints.web.exposure.include=* management.endpoint.health.show-details=ALWAYS logging.file.name=/app/logs/spring-boot-admin-client.log management.endpoint.logfile.external-file=${logging.file.name} eureka.instance.metadata-map.user.name=root eureka.instance.metadata-map.user.password=root重点是
eureka.instance.metadata-map.management.context-path=${server.servlet.context-path}/actuator和management.endpoint.logfile.external-file=${logging.file.name}如果你的项目指定了context-path,那么需要指定
eureka.instance.metadata-map.management.context-path来告诉Spring Boot Admin。如果不指定会出现下面这种情况。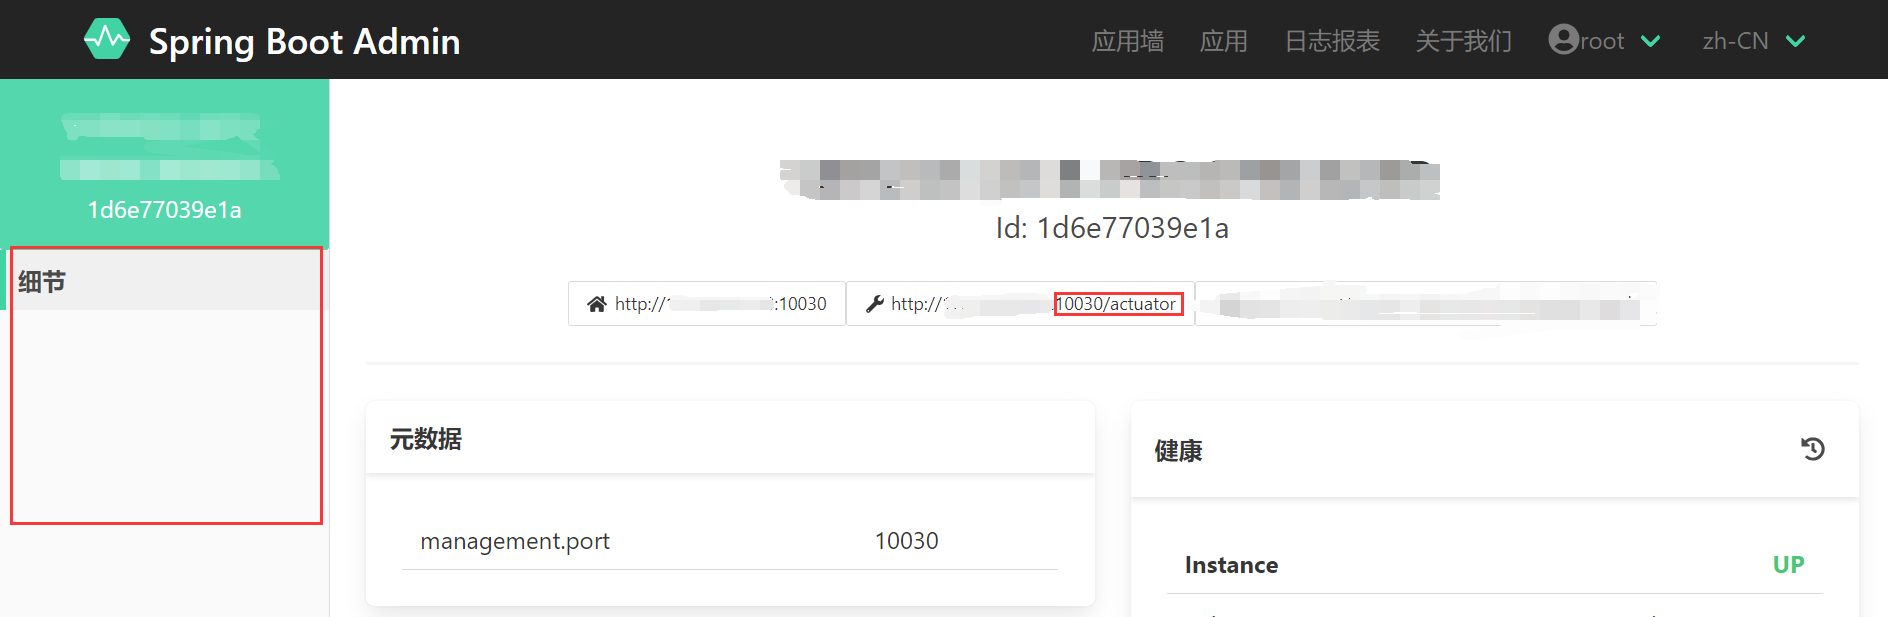
如果你使用Spring Cloud Config,然后你的application.properties在远程仓库。那么可能
/actuator/logfile端点404,但是其他的端点正常。关于这个问题,详见Spring Boot Issue#18191。临时解决办法就是使用
management.endpoint.logfile.external-file。另外,对于这个问题,Spring Cloud也又有相应的修改,修复这个问题,见Use new boot ConfigData framework #703。
目前,我的Spring Cloud的版本为
Hoxton.SR8。其中Spring Cloud Commons的版本为2.2.5.RELEASE。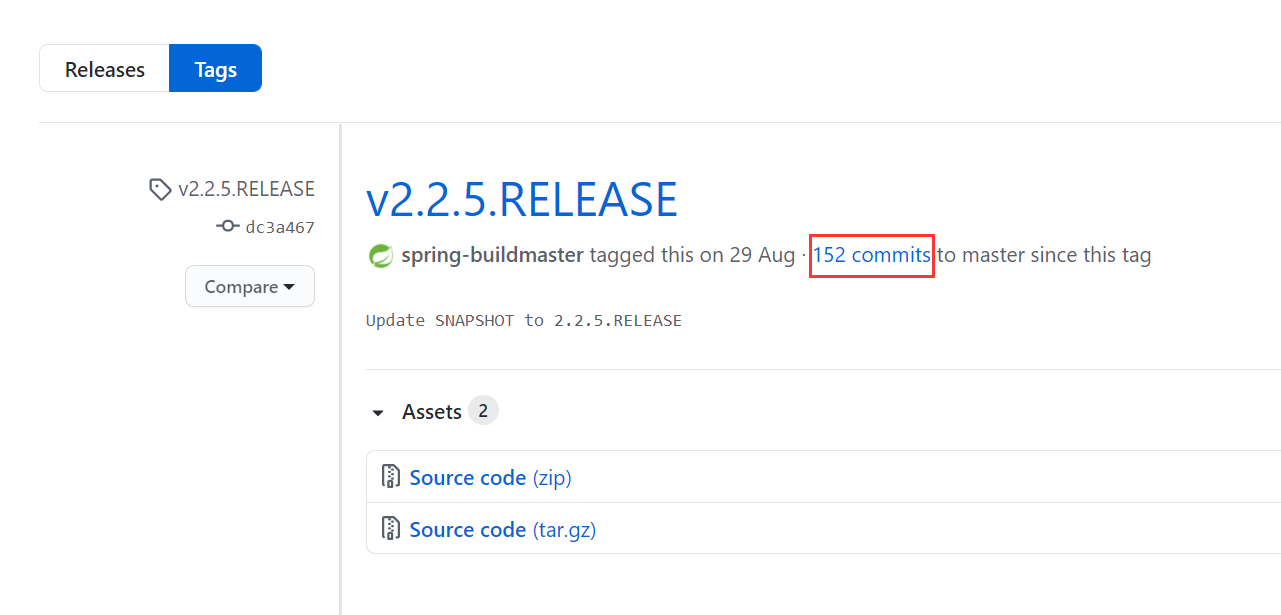
可以看到,在这个版本之后有152个提交。其中就有我们期望的修改。

所以目前我的版本还是会有对应的问题,所以需要加
management.endpoint.logfile.external-file
关于/actuator/logfile端点404,还有其他的方式。
- logging.file.name的配置放在bootstrap.properties里。
- logging.file.name在启动参数里面设置。
Spring Security
我的其中一个Client已经使用了Spring Security的表单验证,且用户名和密码是存在数据库的。所以,这里我只需要加上Http Basic的验证。
1 2 3 4 5 6 7 8 9 10 11 12 13 14 15 16 17 18 19 20 21 22 23 24 25 26@Configuration @Order(1) public class ApiSecurityConfiguration extends WebSecurityConfigurerAdapter { @Value("${eureka.instance.metadata-map.user.name}") private String username; @Value("${eureka.instance.metadata-map.user.password}") private String password; @Override protected void configure(AuthenticationManagerBuilder auth) throws Exception { auth.inMemoryAuthentication().withUser(username).password("{noop}" + password).roles("ADMIN"); } @Override protected void configure(HttpSecurity http) throws Exception { http.csrf().disable(); http .antMatcher("/actuator/**") .authorizeRequests() .anyRequest() .authenticated() .and() .httpBasic(); } }这里配置了
inMemoryAuthentication,这不是必须的,因为我已经有使用数据库中用户名和密码的。如果配置inMemoryAuthentication,需要修改application.properties1 2eureka.instance.metadata-map.user.name=数据库中的用户名 eureka.instance.metadata-map.user.password=数据库中的密码这里我不想使用数据库里的,因为数据库的用户名和密码容易发生变动。
总的来说,Spring Boot Admin其实并不难,只是会需要Spring的其他技术栈。如果对Spring的技术栈都非常熟悉的话,需要做其他的一些改动就游刃有余了。